BLOODLINE EDITION
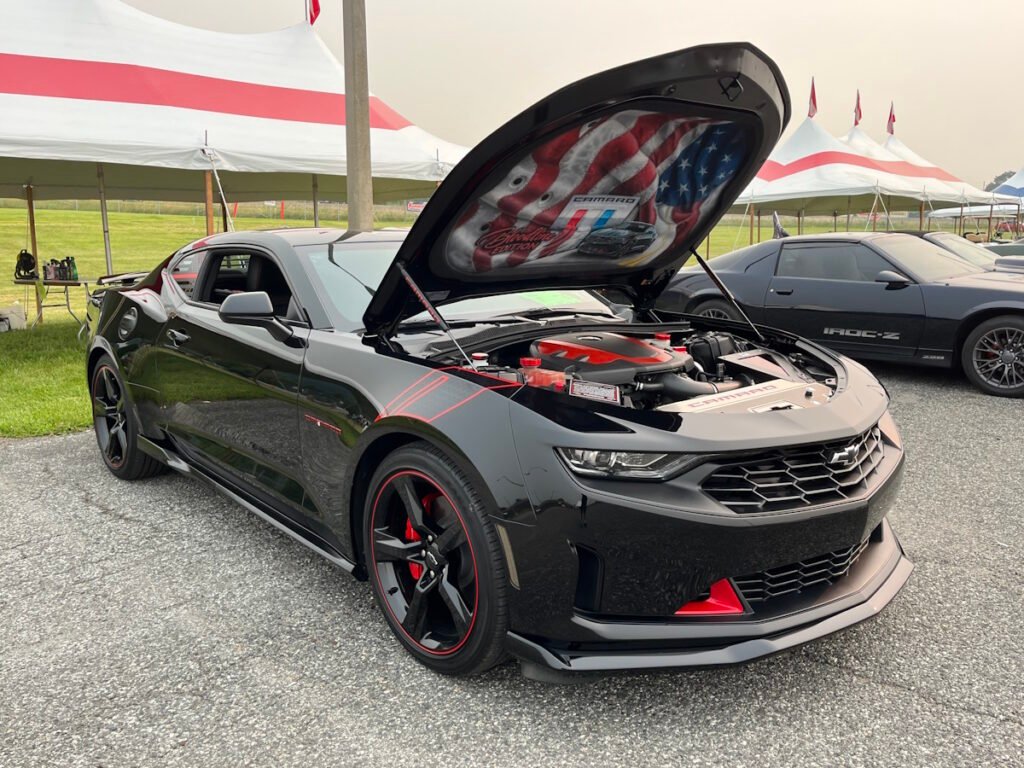
2023 CAMARO 3LT RS
The car that started Muddy Carz, and the story behind the Bloodline name.
Welcome to the Bloodline Edition page. Every few months, Muddy Carz will spotlight an awesome build spotted in the wild. It could be a car show entrant, a club member, or someone parked outside a local restaurant. When we see a build we think is worthy, you’ll find it here.
For our very first Bloodline Edition, we’re starting with the car that started it all: my 2023 Camaro 3LT RS. And before the messages start rolling in saying this car is a little underdeveloped for this page, you’re absolutely right. BUT… this is the car that started the whole idea of Muddy Carz, so I hope you enjoy the ride.
The Inspiration
Two influences. One build.
01
Redline Edition
→ The automotive inspiration
Chevrolet’s Redline Edition takes a dark car and adds just enough red to change its whole attitude. It showed me what a little red could do on a black Camaro.
02
USMC Dress Blue
→ The personal inspiration
I served in the United States Marine Corps from March 1980 to September 1984 as an automotive mechanic (MOS 3521) and left as a Corporal. Working on vehicles was in my blood long before this Camaro came along. Dress Blues are dark, sharp, and instantly recognizable, and they’re worn with pride.
03
Bloodstripe
→ The element that tied it together
The scarlet stripe on the Dress Blue trousers of Marine NCOs and officers. Tradition connects it to the Marines who fell at Chapultepec in 1847. Corporals and above earn the right to wear it, and I earned mine. One red line that carries a lot of meaning.
04
Bloodline Edition
→ The result
Black, with red running through it. Redline gave me the look. The blood stripe gave it meaning. One came from a Chevrolet showroom, and the other I earned in the Corps. This Camaro is where the two meet, and every red accent on it is a nod to both. That’s what Bloodline Edition means. Going forward, every build featured here carries that same spirit: a car built with purpose by someone who put a piece of themselves into it.
The Wait
I ordered this Camaro in June 2022, speccing it out myself on Chevrolet’s build configurator. I took it to a dealer I’d actually had a decent experience with and asked if they’d work with me to put the order in. Neither of us expected what came next. The build date kept getting pushed back, and before I knew it, the plant was turning out what would be the final model year of the Camaro. Was mine ever going to get built?
I stayed in touch with the dealer, and they did everything they could to push my order through. Around February 2023, I got a call asking if I was still interested, since it had been so long since I’d ordered it. I said, “Yes, of course. That’s my configuration!” About six months later, it finally arrived.
Now the customization could start.
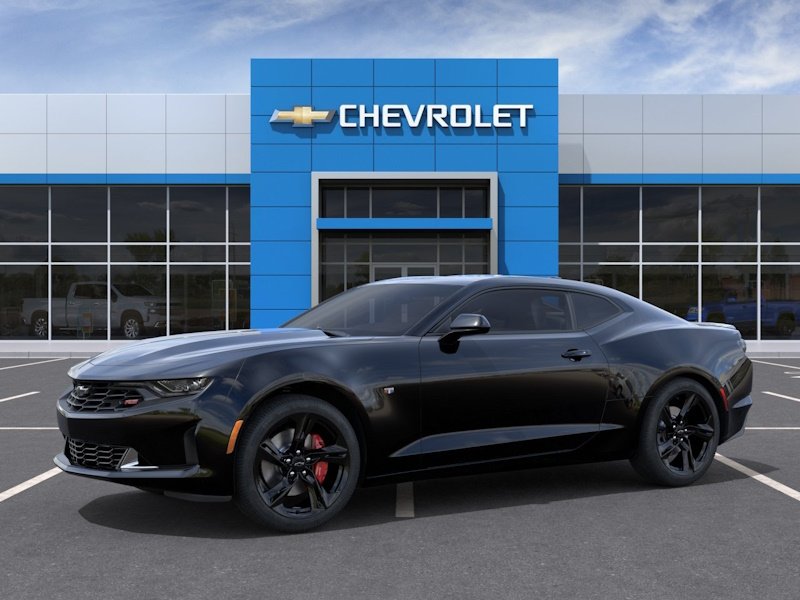
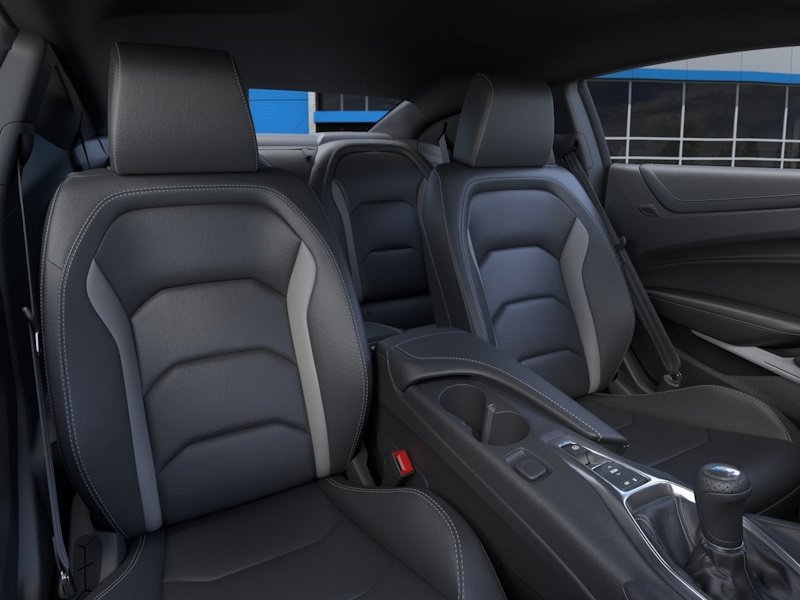
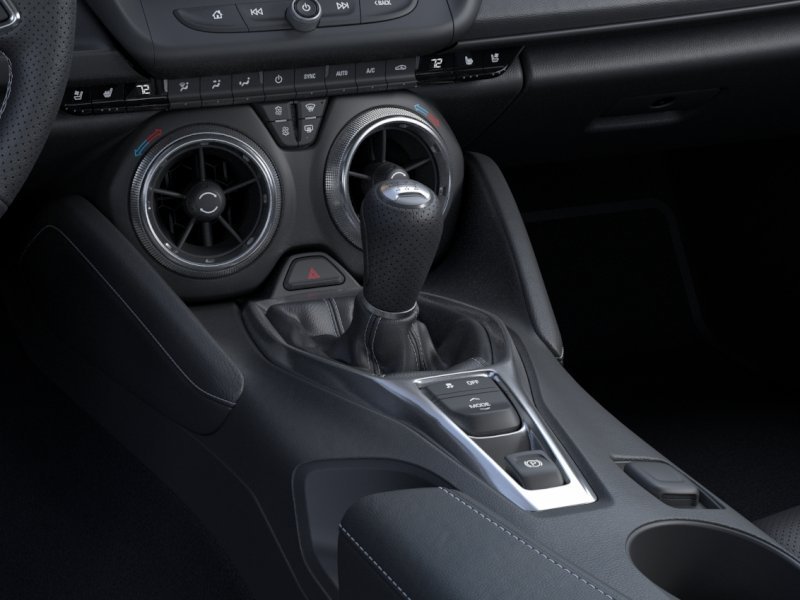
My build, as configured on Chevrolet’s website.
The First Mod
The car showed up exactly as ordered: black paint with Carbon Flash (very dark gray metallic) wheels. This was the car I built, with the options I wanted, not a dealer lot special loaded with options that didn’t fit my style.
During the long wait, though, I’d come across a few options I wish I’d known about when I configured the car. The standouts were the Chevrolet Camaro Redline Edition fender emblems and the Fender Hash Decal. Not some Etsy, eBay, or Amazon stickers, but genuine GM parts. I tracked down the part number for the black decal with the red outer stripe, but when I entered my VIN on Chevrolet’s website, the black version never showed up. Never one to give up on something I knew would look great on a black Camaro, I found another site that had it and ordered it right away. I ordered the Redline emblems while the car was still at the dealer, and they gladly installed them.
That decal and those emblems were my first mods, and I had no idea they would be the start of my journey into car culture. I realized I now had a ticket into just about any car show I wanted. Sign up, pay the entry fee, and see what people think. The feedback was so good it pulled me right into the car show scene. And that meant one thing: more mods.
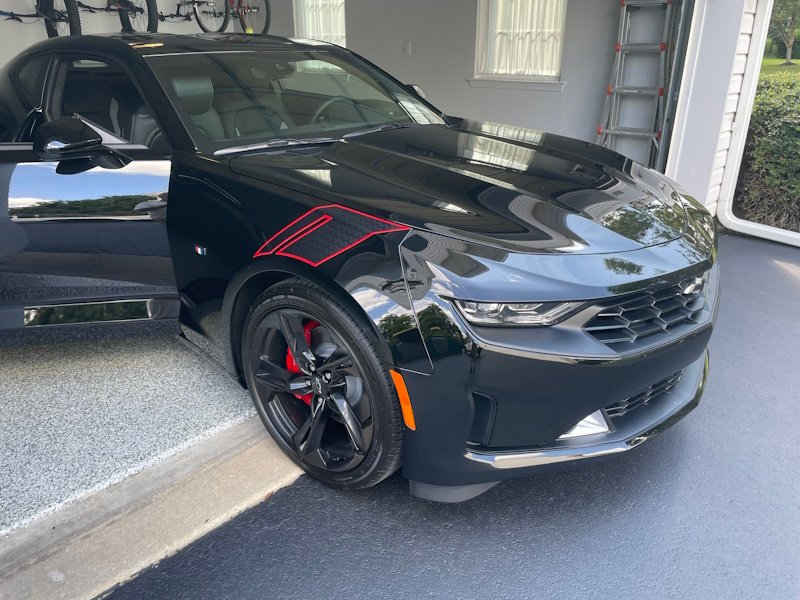
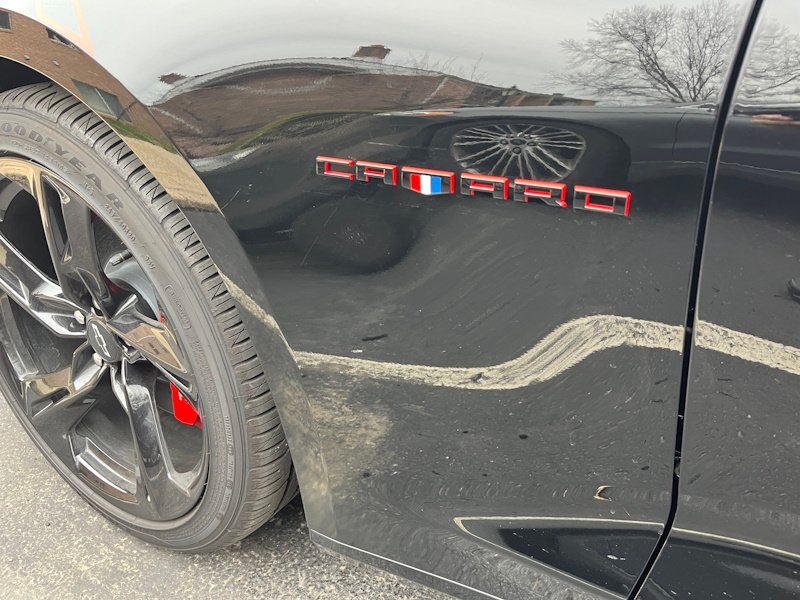
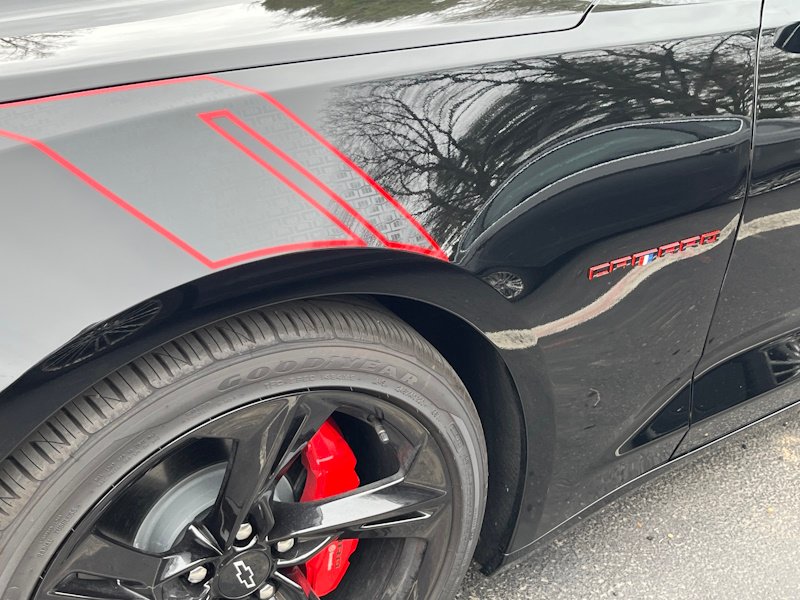
Going Red
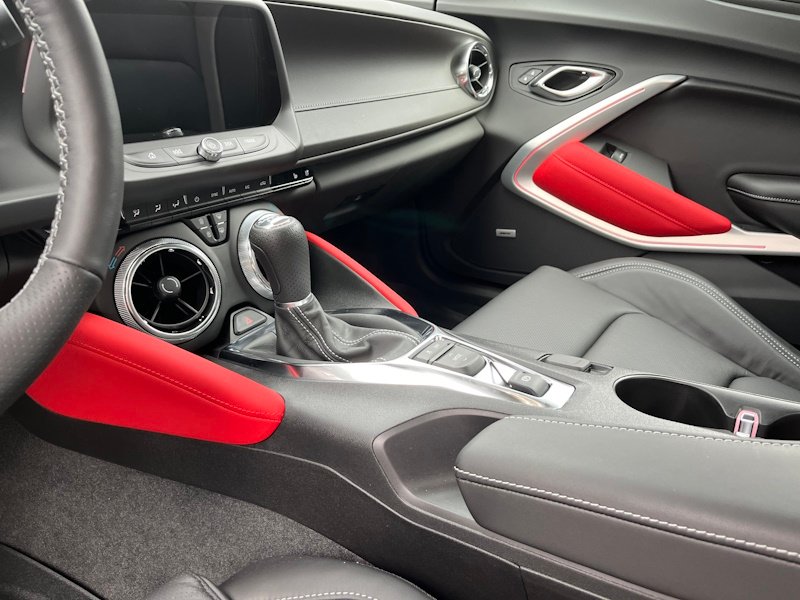
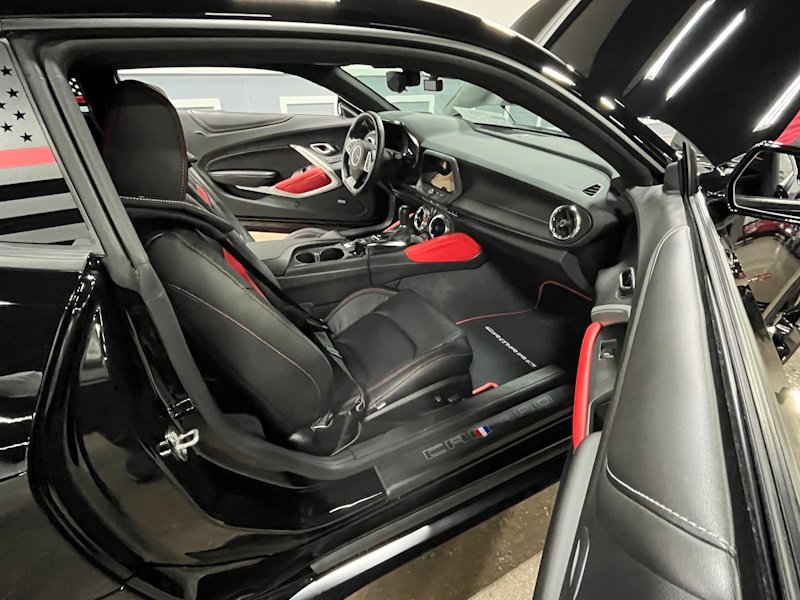
Day after day, month after month, mod after mod, I realized I was never going to be “done” with this car. The compliments on the red stripe in the hash decal got me thinking about more red accents. The Redline Edition emblems had already pointed me in the right direction, so I dug through the Chevrolet accessories website and found the red knee bolsters and the red door accent set.
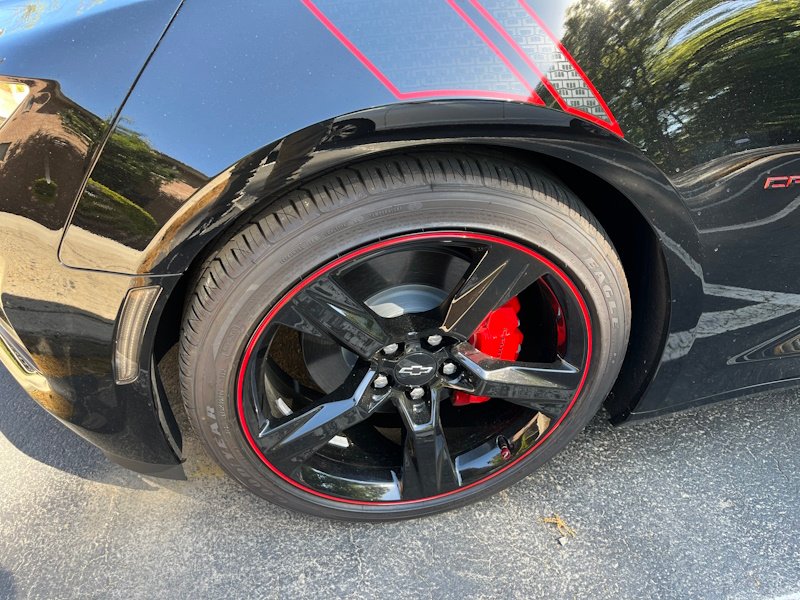
Those little red touches were nice, but they weren’t a “WOW, look what you added” moment. The next big step was the Chevrolet Redline wheels, which have a red stripe around the rim, a nod to old-school redline tires. I took one look and said, “I’ve gotta have them.” Next thing I knew, my car was at the dealer getting a new set of shoes.
Under the Hood
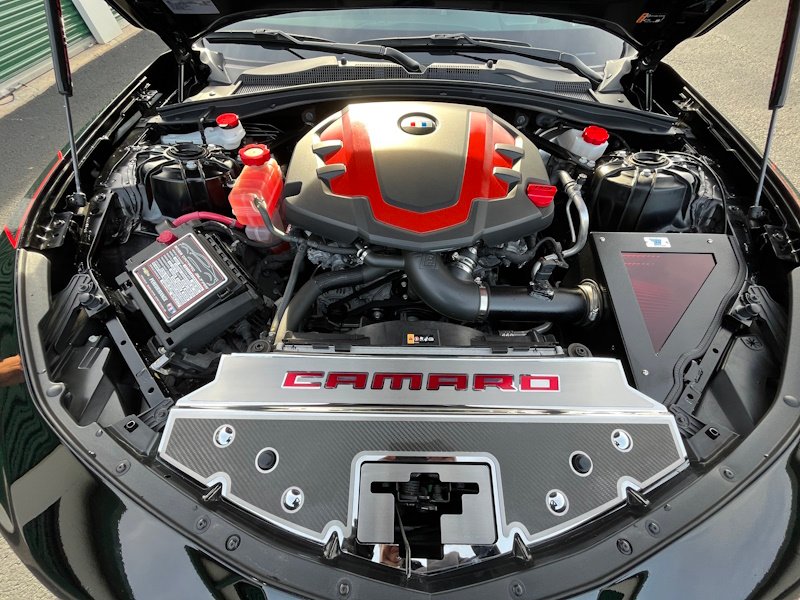
Next came the engine bay. I started with red reservoir caps to sprinkle in more accents. I wanted Chevrolet’s red engine cover, but it had been discontinued, and only the black version was still available. So I bought the black one, and with over 20 years of experience as a painter, I turned it red myself, insert and all.
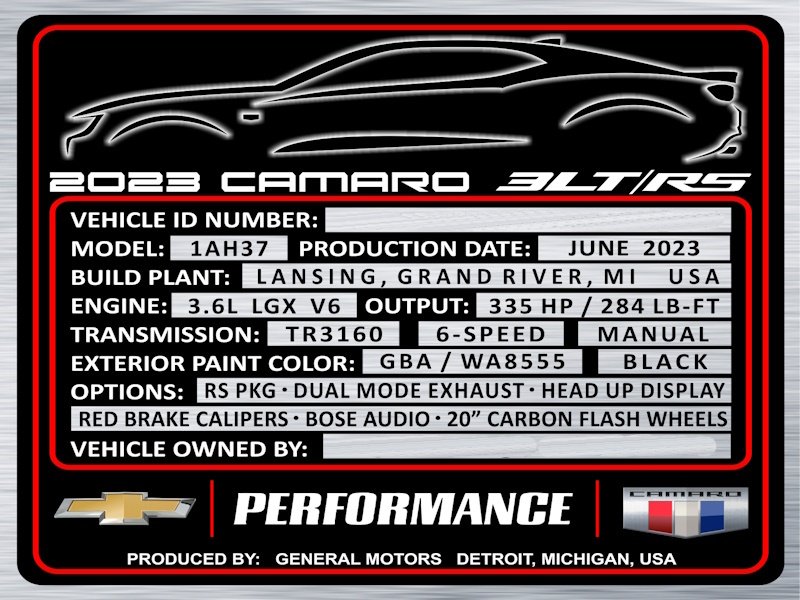
I added a custom data plate that really sets off the engine bay. It attaches to the fuse box lid with plastic push rivets, so it looks like it came from the factory.
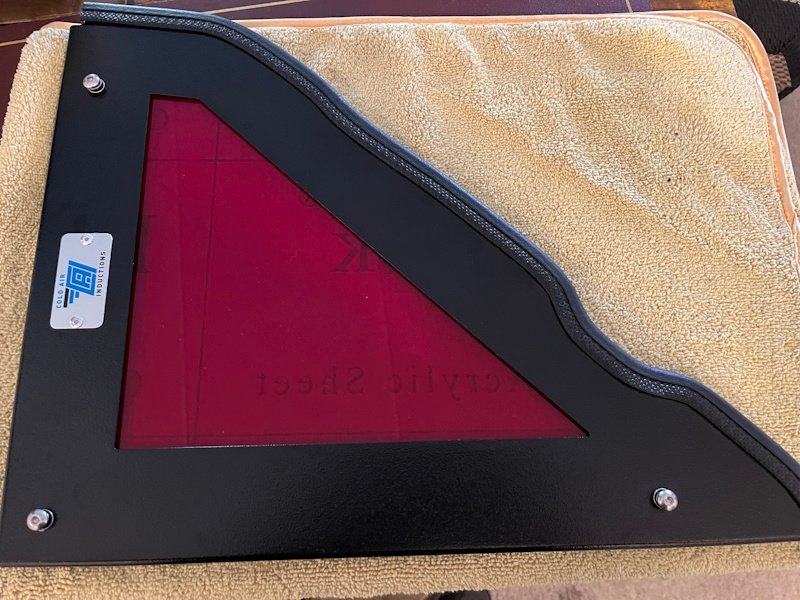
Then came the king of engine bay mods: the cold air intake. Like a lot of intakes, it came with a clear window. That wasn’t going to work for me, so I bought a sheet of transparent red plexiglass and replaced it.
Body
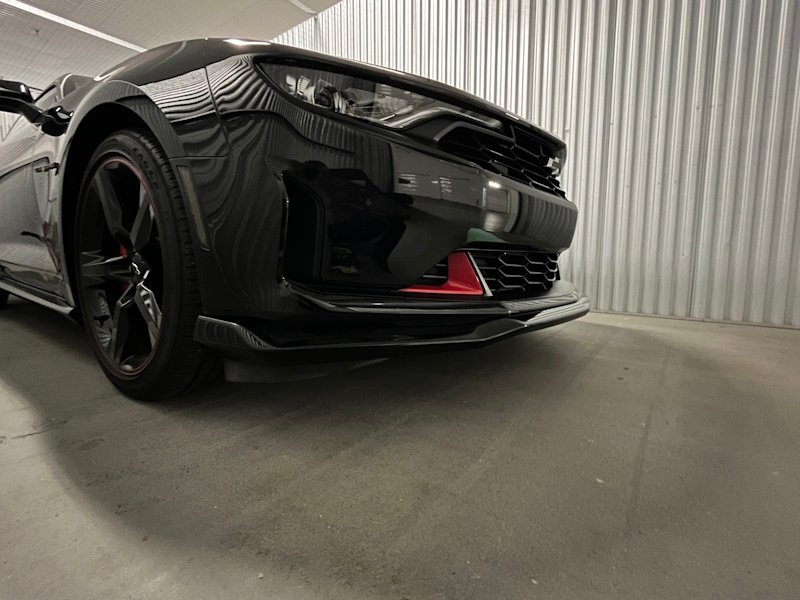
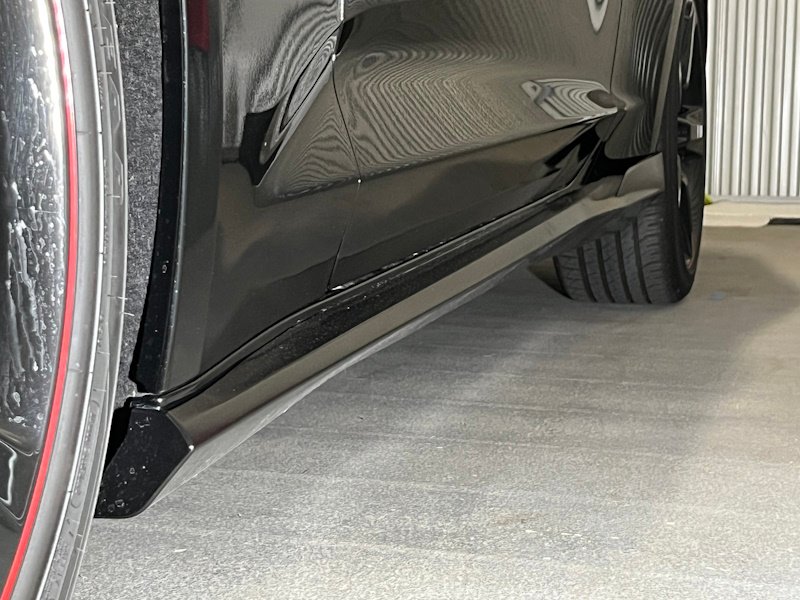
From there, it was on to the Ground Effects Package: the rocker panel molding set and the front splitter.
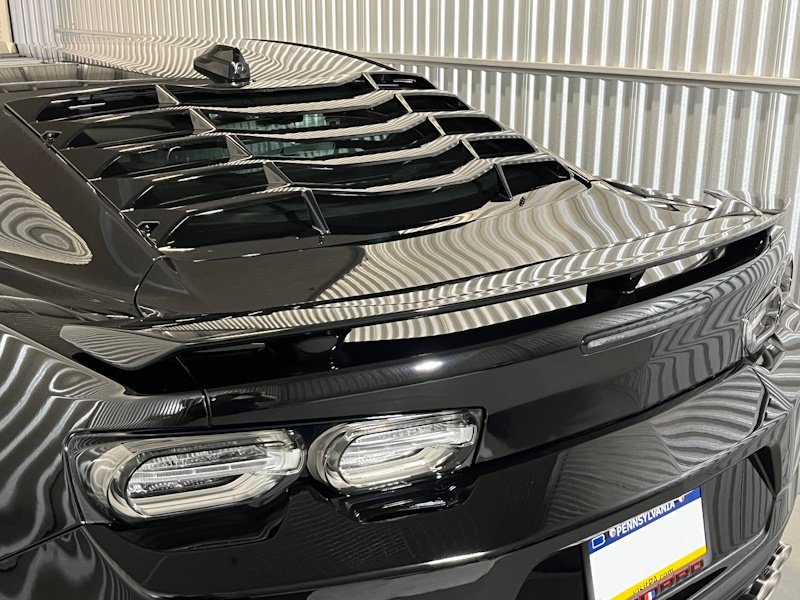
Next, I needed a rear spoiler. Up to this point, everything I’d added was an OEM Chevrolet part, no aftermarket, and I wasn’t about to change that now. From studying Camaro parts, I knew the spoiler I wanted wasn’t going to come easy. I didn’t want a surface-mount spoiler. I wanted the stanchion-style ZL1 Spec Spoiler listed on Chevrolet’s website. The problem? My deck lid didn’t have the holes for it, and I damn sure wasn’t drilling them.
After a long stretch of scouring Camaro forums and marketplaces, I finally found someone selling a Nightfall Gray deck lid with the ZL1 Spec Spoiler already mounted on it. Needless to say, I couldn’t get in my car fast enough. I dropped the deck lid and spoiler off at Executive Collision in Eagleville and had them spray it black and get everything installed. Once it was back on the car, I finally had the spoiler I’d been hunting for—and man, was it worth the wait.
Interior
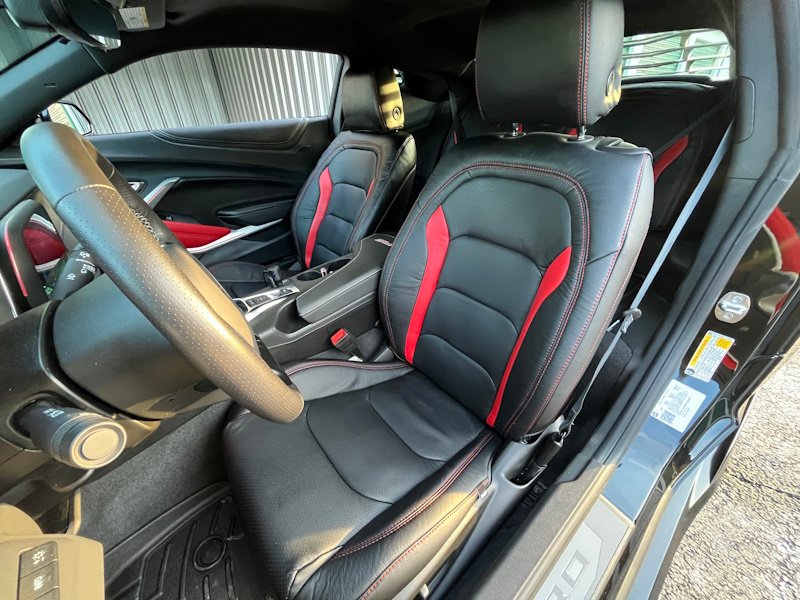
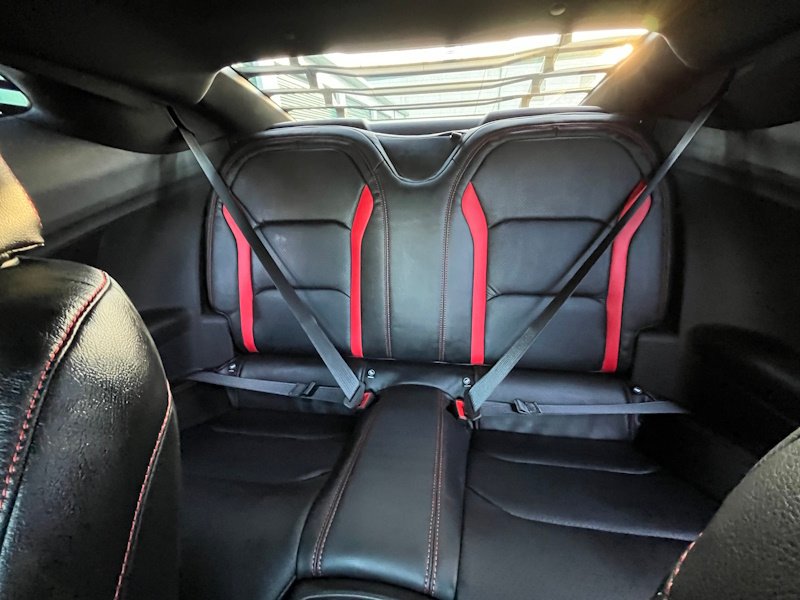
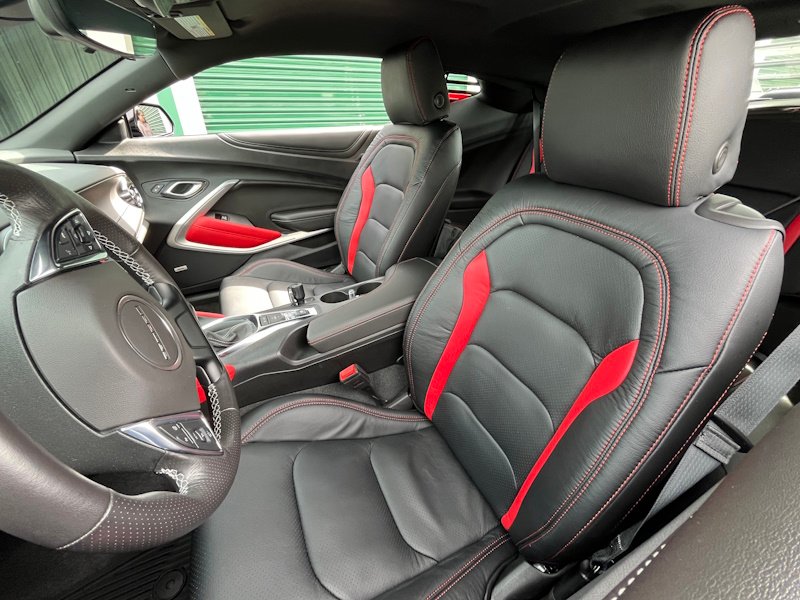
Next up were the seats. Most sixth-gen Camaros have gray inserts, called wings, in the leather design. The interior didn’t look bad, but it didn’t match the black-with-red-accents look I’d been building toward. Then I found Katzkin, a company that makes custom leather seat interiors to match your style. I ordered mine with red wing inserts and double red stitching.
Dark, with a red stripe running through it, just like my Dress Blues. Now the Bloodline Edition was really taking shape!
The Hood Liner
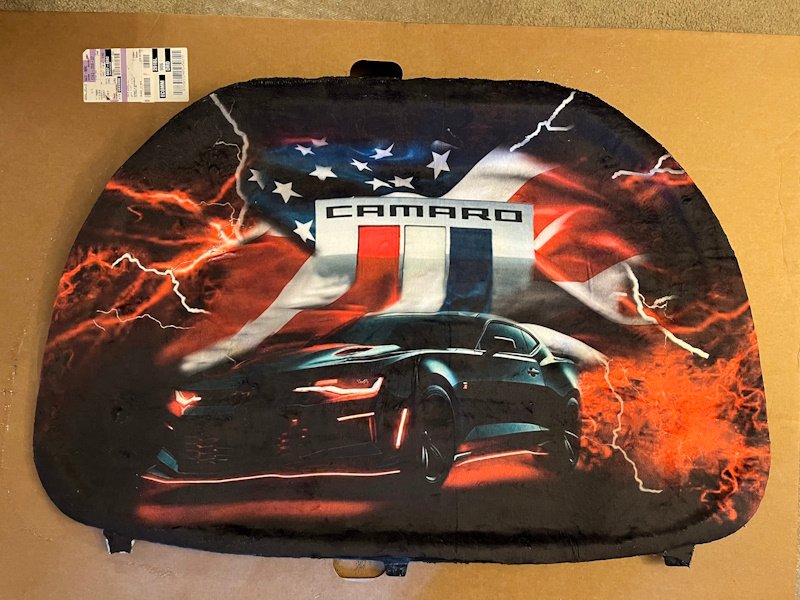
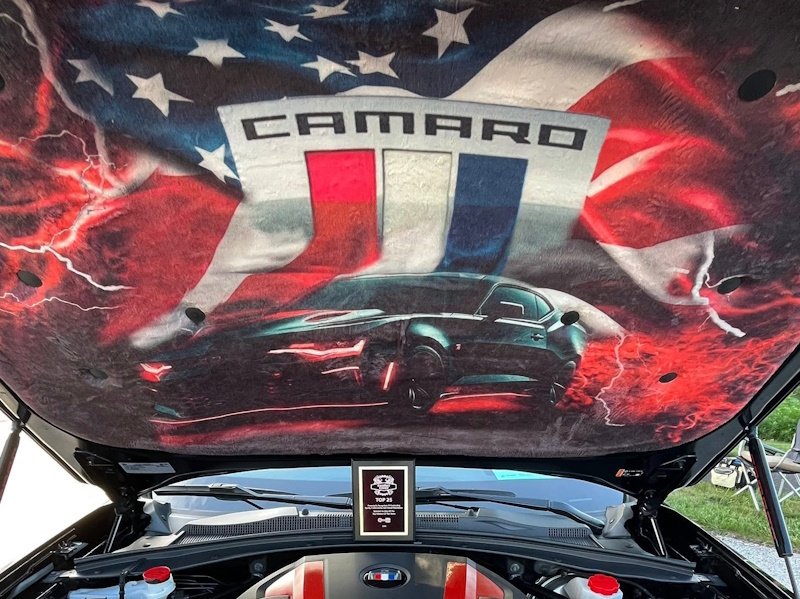
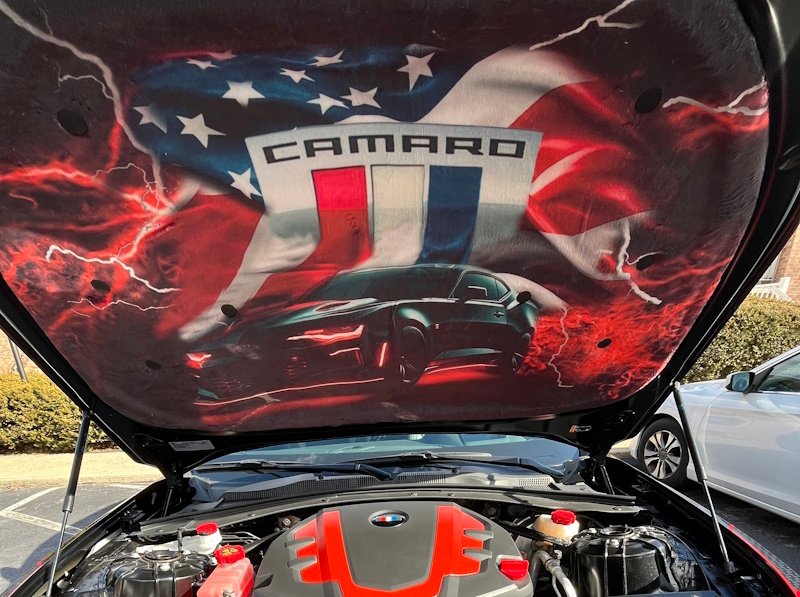
There’s one mod I’ve left off the list until now: my custom hood liner. I wanted something under the hood that really popped in color and design. My ideal hood liner was going to be airbrushed, but a competent airbrush artist isn’t cheap, and they aren’t easy to find. I kept my eyes and ears open, but no artist turned up, and I couldn’t wait any longer.
So I found a printer who could take my artwork and print it on fabric. I then adhered the fabric to the OEM hood liner, just like hanging wallpaper. The result was everything I’d hoped for.
The Airbrush Artist
Now jump ahead. Guess what? I finally found an awesome airbrush artist I could actually afford. The trick was coming up with a design similar to the printed one, but one that let the detail of airbrushed artwork shine.
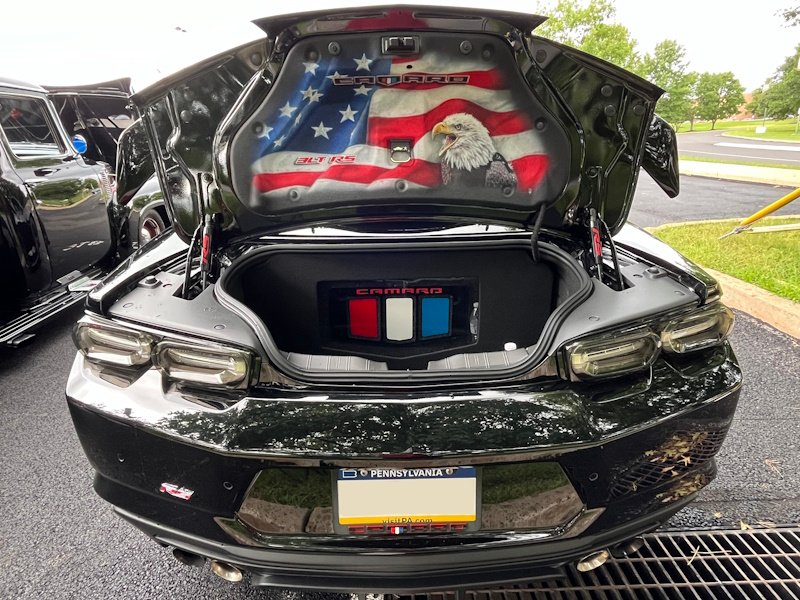
After a few conversations and mock-ups from the Brandon over at The Gray 8 Custom Paint and Airbrush, we landed on a design. We kept the same elements as the printed hood liner and kicked it up a notch with the detail of the American flag, the Camaro logo, the Bloodline Edition logo, and, best of all, a black Camaro that looks exactly like the car it’s on. I was so taken with the airbrush work that I had to ask Brandon to do the trunk liner too.
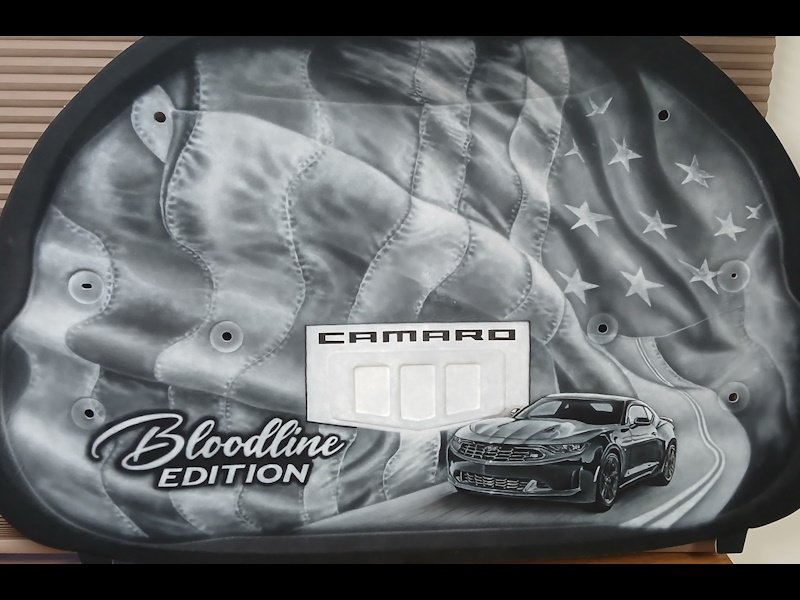
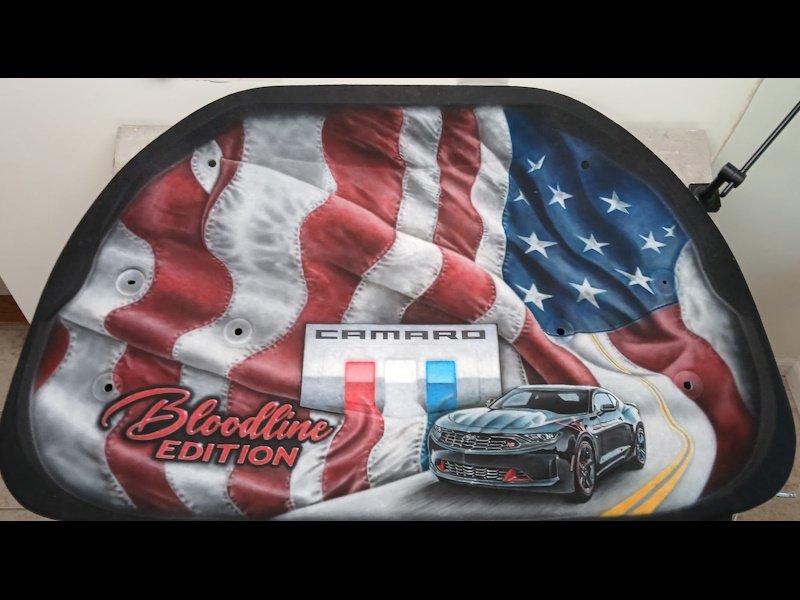
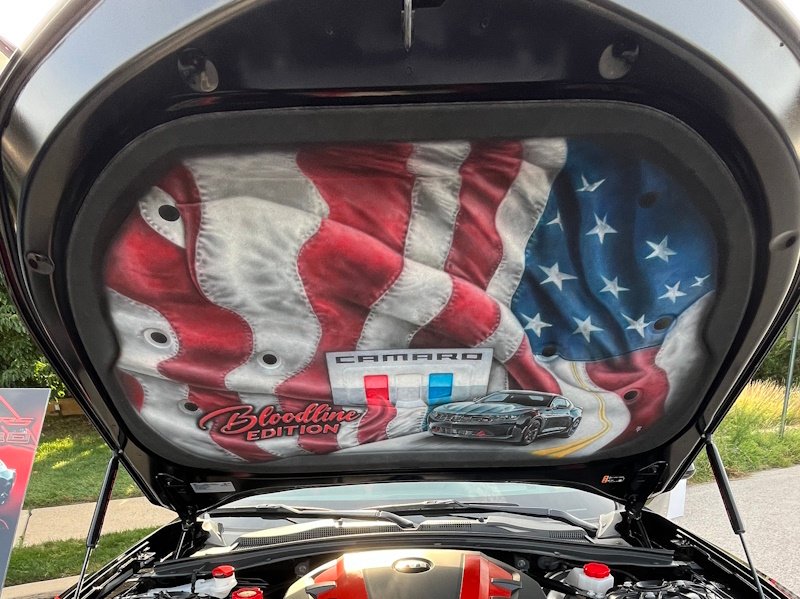
Left: the artist’s work in progress. Center and right: the finished hood liner.
The Trunk
The trunk liner came with its own set of obstacles. First, the liner has deep contours. Could our design work with them? Second, I actually use my trunk at every car show. I bring chairs, coolers, my detail kit and supplies, even my own bucket of water. If I was going to do the trunk liner, I’d have to rethink what I pack for shows and how I pack it.
First, though, the artist needed a scene. After two or three rounds of mock-ups, we settled on the final design: the American flag, the Camaro emblem, the 3LT and RS emblems, and a highly detailed bald eagle. Then it was my turn to do my part and decide what I really need at a car show. I cut back on the cargo and added a mod that I used for this year’s indoor show at the Philly Expo Center in Oaks. Now my car show setup is easier, with less stuff, and I have a place to hide what I still bring.
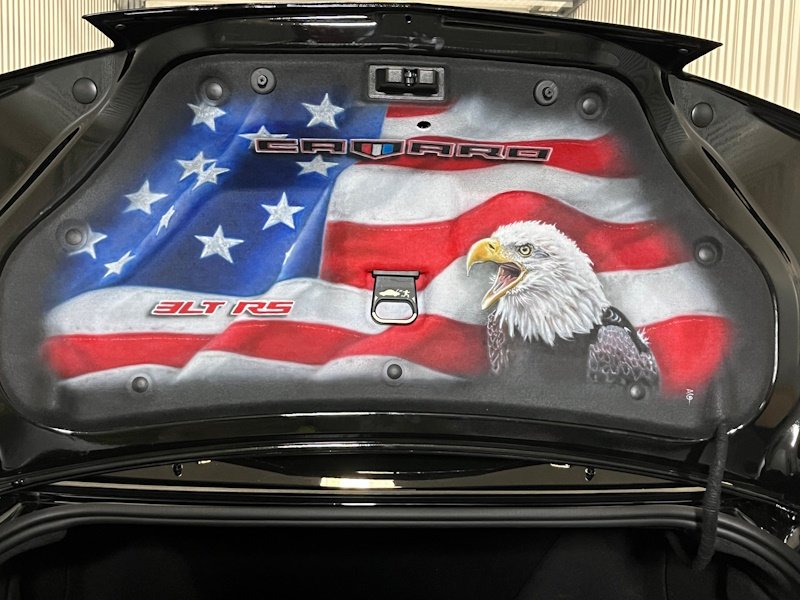
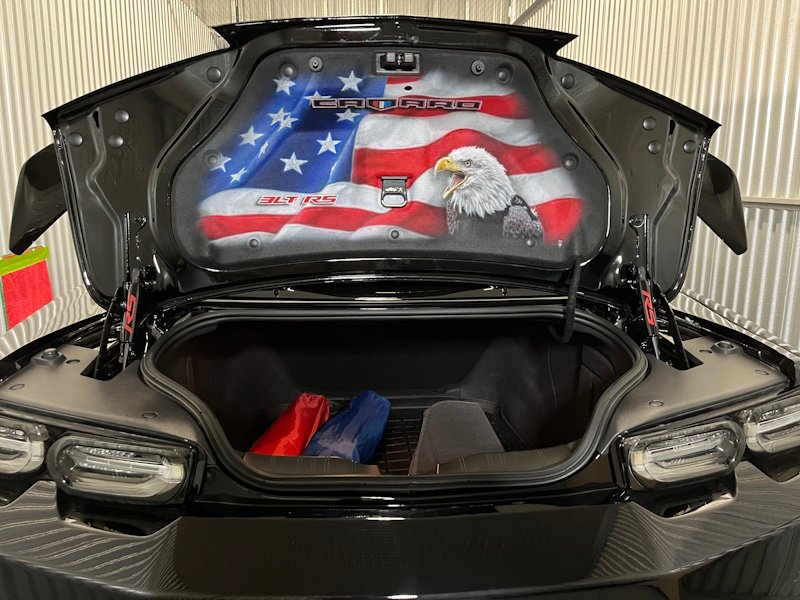
Breaking Protocol
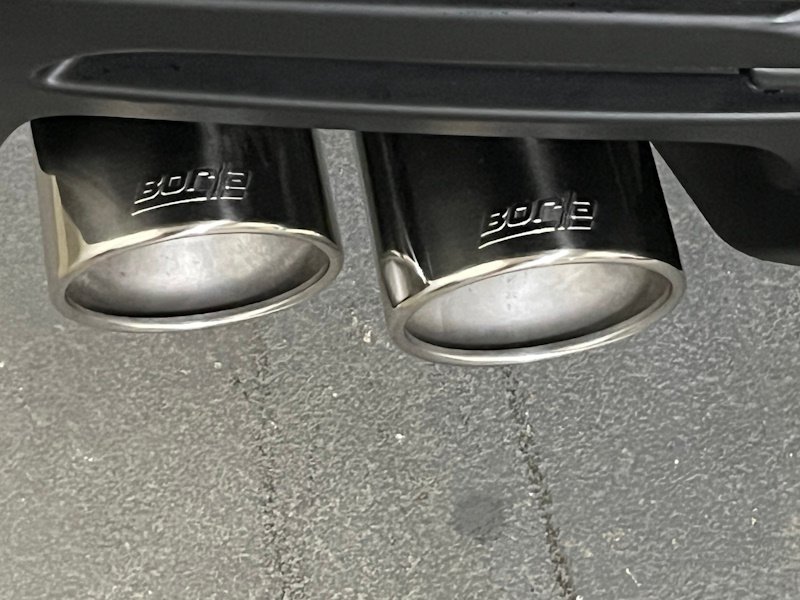
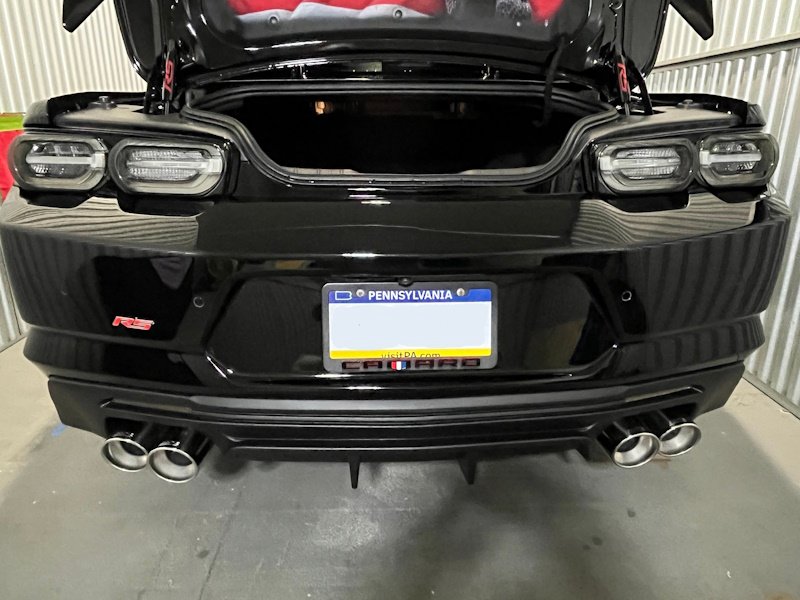
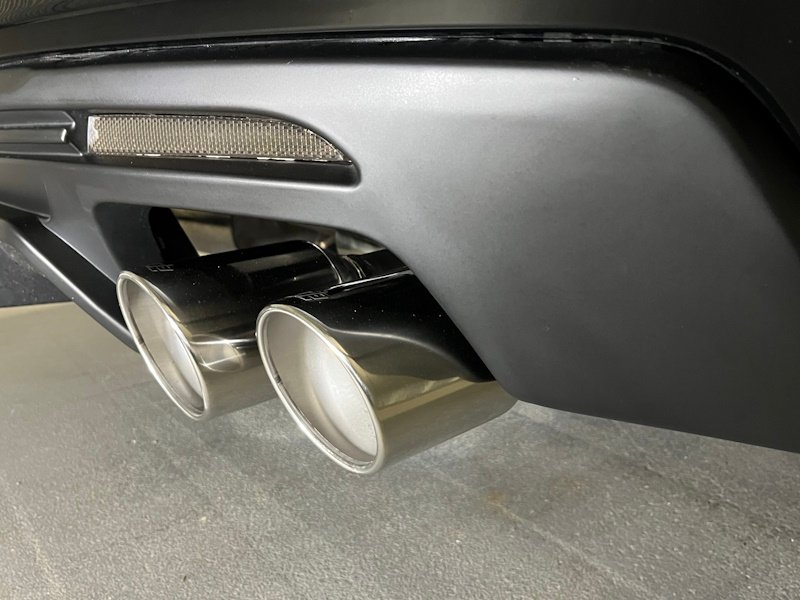
Every mod up to this point added to the black-and-red look of the Bloodline Edition. This last one breaks that protocol. It isn’t on display, and there’s nothing black or red about it. It’s a mod you hear, not one you see, and it fixed something that had been bugging me since the day I got the car. My last addition to the Bloodline Edition Camaro (at least in this story) is a Borla ATAK axle-back exhaust.
The stock exhaust would lose its rumble at certain RPMs. The Borla rumbles nearly all the way through each gear, and it’s deeper and louder too. Now the car finally sounds the way it looks.
What’s Next
So that’s where the Bloodline Edition Camaro stands today. Is it finished? Not a chance. A build like this is never really done, and I’m already keeping an eye out for the next upgrade.
Next time, the spotlight turns to someone else’s build. If you spot a car that deserves to be a Bloodline Edition, or you think yours does, let us know through our Contact page. We’ll see you at the next show.